With several new projects starting this summer, I thought I’d show you some pictures of buildings undergoing demolition. Most of what you’ll see is interior demolition, as we prepare to do large-scale changes. There are often surprises, mysteries, and disappointments to be discovered. Sometimes we even see something great that we didn’t know was there.
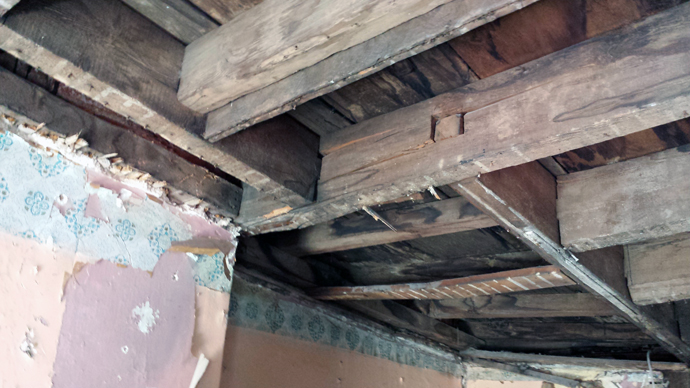
Where floors and roofs intersect them, the builders need a way to transfer load around the chimneys. This often results in “creative” solutions that can weaken the wood framing, leading to failure over time. Here, you can see where the roof beams have cracked, probably from the weight of a heavy snowfall. We’ll need to rebuild this part of the roof to better support it, especially since we want to put a deck on top.
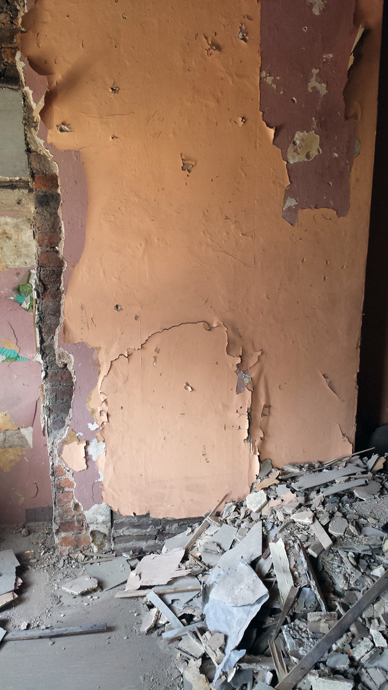
In the picture above, you can see an old fireplace that was hidden behind paneling. It’s pretty obvious where the opening was–just follow the cracks. You can also see layers of old paint and wallpaper. The fireplace was bricked in many years ago, when the house went from being heated by fire to being heated with oil.
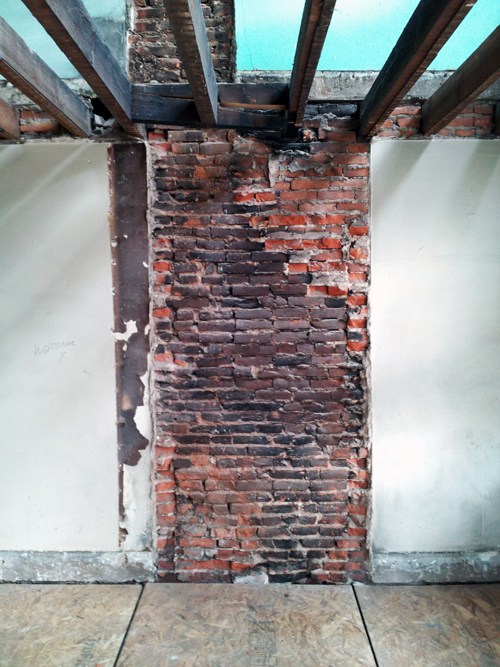
In the picture above, from another house, you can see where we removed a large, non-functioning brick fireplace. Behind the old brick, you can see how the chimney flue snaked its way to the left before going up through the second floor and out the roof.
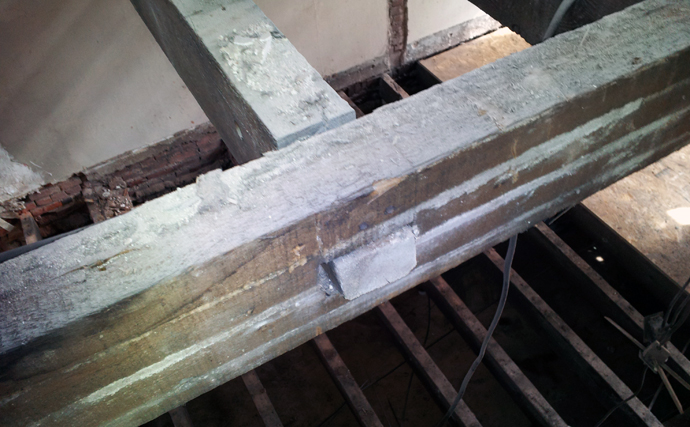
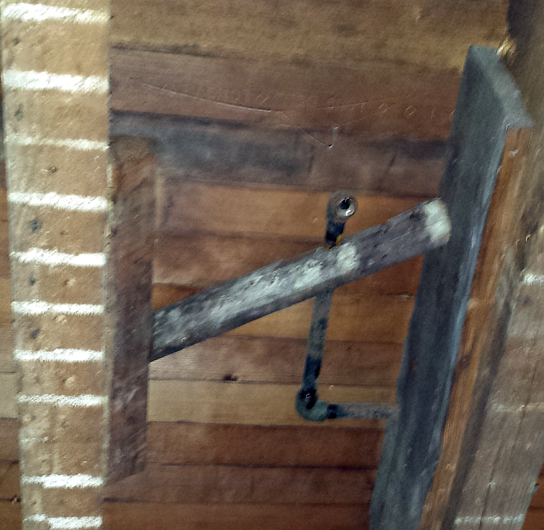
Here’s a better look at the type of joinery used in the roof picture above, from a different house. Way back when, they didn’t use metal hangers to hold framing together; they used joinery. A rectangular hole was put into the supporting beam, and the end of the joist that connected to it was cut to fit into it. While in some ways this is a beautiful solution, it does put the beam in a weakened position. This is why the roof failed. In the case of this floor, above, nothing needs to be replaced.
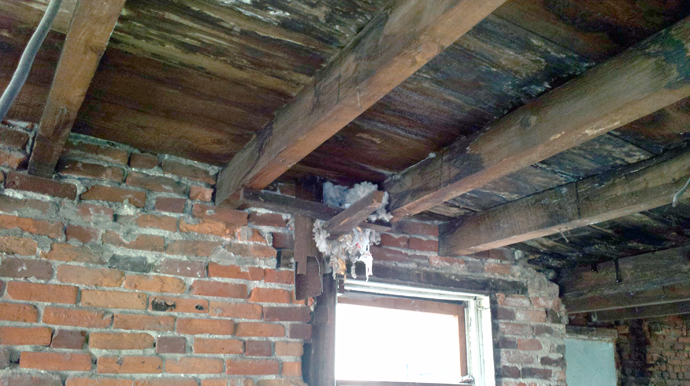
Where floors and roofs intersect them, the builders need a way to transfer load around the chimneys. This often results in “creative” solutions that can weaken the wood framing, leading to failure over time. Here, you can see where the roof beams have cracked, probably from the weight of a heavy snowfall. We’ll need to rebuild this part of the roof to better support it, especially since we want to put a deck on top.
In the picture above, from another house, you can see where we removed a large, non-functioning brick fireplace. Behind the old brick, you can see how the chimney flue snaked its way to the left before going up through the second floor and out the roof.

One cool thing you’ll find in an older home besides hidden fireplaces is old gas pipes. Many of these houses had gas lighting installed when they were built. The tops of the floor joists were notched to allow the piping to pass by, and the fixtures were up on the ceiling or on the wall. This picture shows the end of a pipe where a fixture was once attached. In houses that predate gas lighting, the installers could remove a single floorboard from the floor above, notch the joists, and install the pipes. Here, you can also see white lines on the floor joists where the wood lath was attached to them. Plaster went over the lath and squished between the individual pieces, holding everything together.
People often want to do exposed brick. After all, these old brick homes must have some beautiful brickwork hidden behind those paneled walls, right? Well, sometimes that’s true. However, more often than not there’s a reason why everything is hidden.
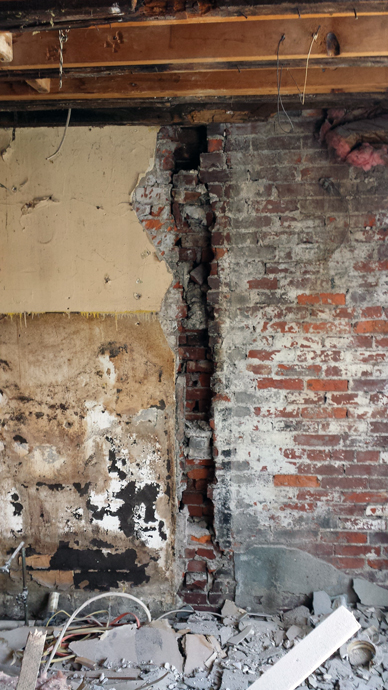
Just because the houses are old doesn’t mean that the masons cared a lot about what the brickwork would look like behind the plaster or other finishes. In the picture above, you can see old plaster on the left, the remains of a long-gone intersecting brick wall at the center, and exposed brick to the right. With a little care that exposed brick might be able to stay exposed. The biggest problem with leaving it exposed is the “salmon brick”–that orangey brick that you can see interspersed in the wall. This brick was intended for interior, hidden areas. It wasn’t fired for as long as regular brick, and over time water and humidity will break it down. If you live in an old brick house, you probably know what I mean. Those bricks that are constantly crumbling, leaving little piles of orange dust everywhere? Those are salmon bricks.
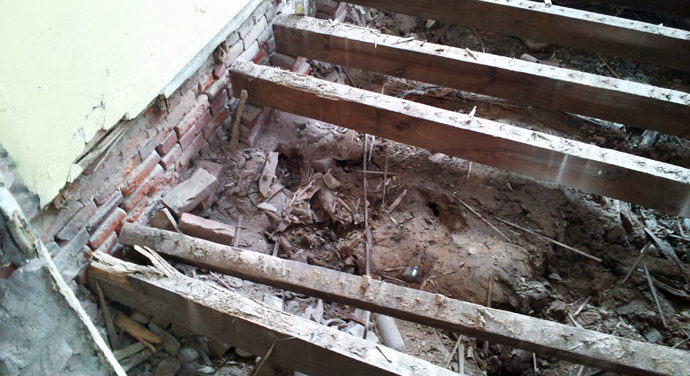
Sometimes, you just find problems. In the picture above, there are serious flaws that needed to be corrected before we could move forward. We removed the flooring in the kitchen to find that the floor structure was sitting on top of loose, stacked bricks, which were sitting on dirt. Not ideal, to say the least. We removed the old structure, sealed the dirt behind plastic to keep out moisture, and put in new structure that was attached to the brick walls.
People often want to do exposed brick. After all, these old brick homes must have some beautiful brickwork hidden behind those paneled walls, right? Well, sometimes that’s true. However, more often than not there’s a reason why everything is hidden.
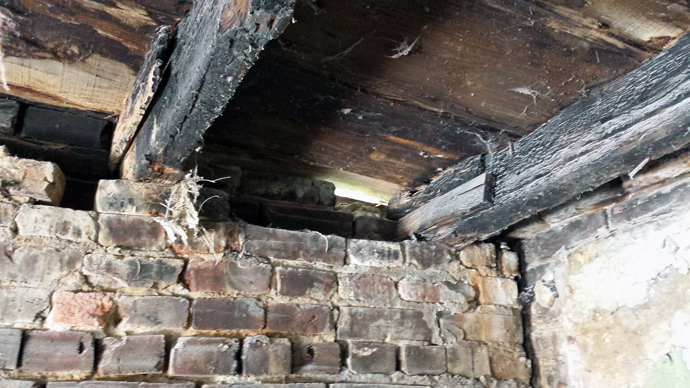
n the photo above, there are several problems. First, you can see daylight through an opening at the top of the wall. That opening has been letting water in, which has eroded the mortar between the bricks. There’s also been a fire, as evidenced by the charred roof structure. Finally, you can see a gap between the plastered wall, on the right, and the brick wall on the left. The room where this picture was taken was added on to the original building, and the additon is separating from the original building. This area will require a lot of remediation to make it safe and dry.
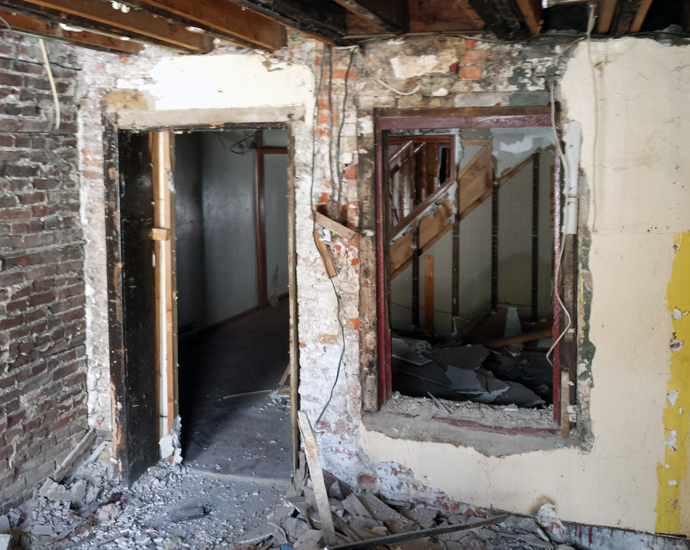
It’s not all bad, though. When the paneling was removed from this wall, we discovered a window we didn’t know about. This opening may be used to connect the two rooms, or it could be infilled with a built-in bookcase.
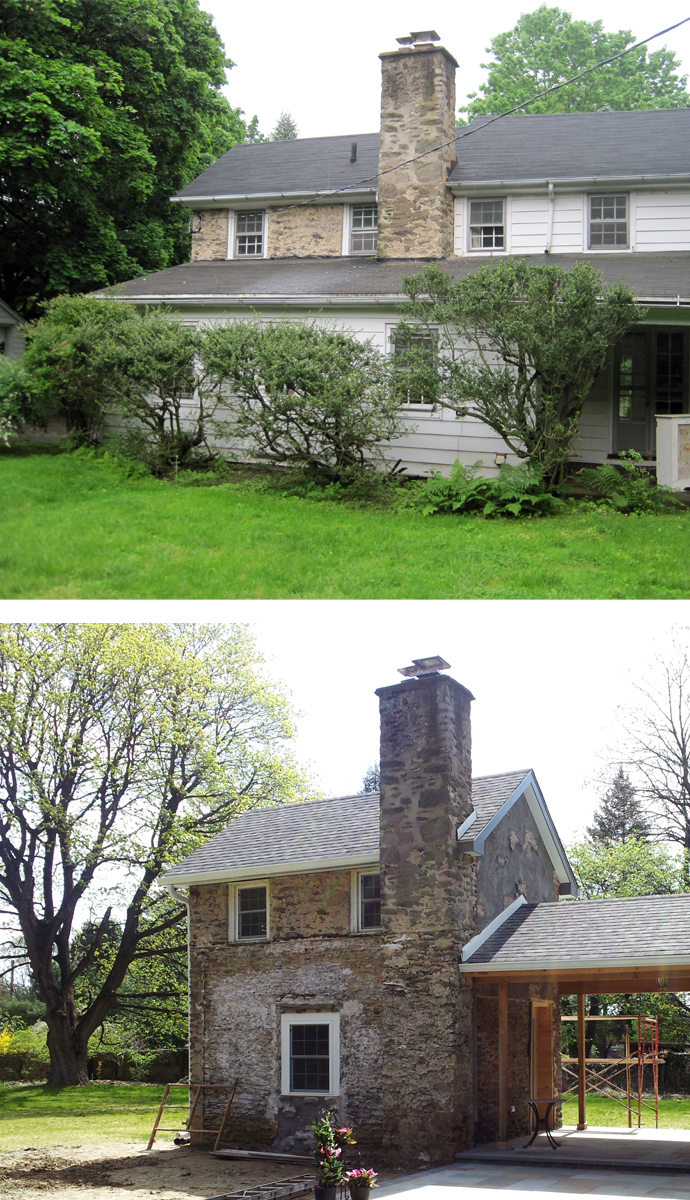
Designing a renovation or addition involves uncovering a building’s hidden mysteries, and sorting out what to do when the existing conditions fall short. It’s always a little exciting and a little scary, all at the same time. What sort of discoveries have you made in your home?
n the photo above, there are several problems. First, you can see daylight through an opening at the top of the wall. That opening has been letting water in, which has eroded the mortar between the bricks. There’s also been a fire, as evidenced by the charred roof structure. Finally, you can see a gap between the plastered wall, on the right, and the brick wall on the left. The room where this picture was taken was added on to the original building, and the additon is separating from the original building. This area will require a lot of remediation to make it safe and dry.
